With a game upcoming this weekend I discovered two things: I needed another cannon and ... I actually had one stashed away! I don't remember buying it but was happily suprised to see it in a box of ECW blisters and figures. Like the previous gun, this is a Warlord Games casting. Great figures, easy to paint. As time was a factor, and this is a light field gun anyway, the base is simple without fortification:


With the gun finished just yesterday it was time for an outing. My ECW figures had not been out of the basement for a long time so I was looking forward to this game. I had to supplement my own figures with some of Jeff's collection; as he had several command stands and ensigns it was particularly handy. In the photos his are the ones on thick pea green coloured stands. The rules used were
Carnage and Glory II, a computer moderated system. I had never used such a system before so this was new ground for me; Murdock had given them a run through a couple of times so knew what to expect.
We deployed for a basic "meeting engagement" scenario. We both went with the standard ECW deployment of cavalry on the wings and infantry in the middle. Although Parliament had the advantage of more infantry, including Dragoons, the King had more cavalry regiments at his disposal. My plan was to try and hold the centre long enough for my cavalry to overwhelm his and close in. I figured that Prince Rupert and his cavaliers were sure to over-run their opponents but I had doubts about how long my foot could hold the centre. It turns out, my expectations were wrong on both accounts....
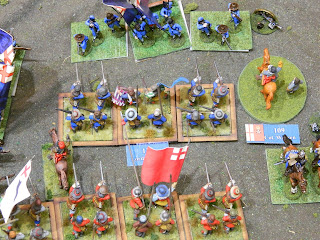
Below, the Royalist centre at deployment: yes, the figure on the hex base waving his hat looking quite a bit like Cromwell is actually the King (oh what a portent of what was to be a in a few short years...)
The Royalist left flank loaded for bear, including the aggressive Prince Rupert (the command figure on the grey on the right edge of the photo):
Although it took us a while to get into the flow of how the game works I did like the system. Each regiment has a number attached to it (the blue tag behind the coronet/ensign of each unit). Whenever the unit does anything- move, cross difficult terrain, shoot, charge, engage in melee, etc- it's number is entered into the program and the end result is determined, and any effects tracked, by the program. Basically the computer does all the tedious record keeping and math. Inevitably we would try to do something like a formation change and we would get the predictable...
Lord Byron's Cavalry Brigade gets wound up for a charge into the enemy waiting in the distance:
The presence of the enemy dragoons entering the hay field doesn't phase them...
... but just to be sure Byron leads a regiment to chase them off. Surely, with Rupert to lead the rest of the cavalry (charging into the enemy in the distance) success was inevitable...
Nope... sadly, Mr. Computer hasn't bought into the Legend that is Prince Rupert of The Rhine and they were seen off and pursued by the Parliamentarian cavalry:
In fact, in what was to be a key feature of the game, Rupert is captured! This is the last we see of him...
Surely, on the right flank where we out number the Parliamentarian horse nearly two to one, things will be better:
Once again... nope... In both cavalry engagements, the Royalists are repulsed and the pursuers chased them down and then continued on to do the same to the supporting regiments they crash into. These two photos show victorious Parliamentarian horse in the background, fleeing royalist horse to the left, and- in the case of the pic directly below- 2 regiments of Royalist horse apparently incapable of providing support (this was Sir John Urry's brigade and he must a have been a real twat as he couldn't motivate, inspire or rally a regiment until the final turn of the game when it was far too late).
In fact, in this game, defeating your opponent seemed to turn the victorious unit into super killer robots of deth!1! On the final turn of the game we fought 6 melees that were a result of pursuers from both sides crashing into otherwise healthy units and in every case but one (including infantry) the pursuers won.
Oddly enough, the area where I thought I might have the most trouble seemed to be my strength: the centre.
Below, Tillier's brigade gains the hill and holds it until the end of the game despite an assault from the Parliamentarian foot.
Below, Lord Byron's foot (blue coated regiment in the middle) refuses to charge the enemy despite the presence of both Sergeant Major Sir John Girlington (mounted figure at the lower left corner of the regiment) and their brigade commander Lord Warren. I can't blame them as they had taken massive casualties from musket fire and yet remained in the battle line. However, had I managed it, I might have created an opening with two other regiments waiting to exploit it.
In the end, the collapse of the cavalry on the right flank and the capture of Rupert on the left was too much for the royalist morale to ignore and the King was forced to leave the battlefield to the enemy.
Overall, a very satisfying game although with no rule book to refer to, learning as I went, and not really knowing what possible outcomes were, or the odds, did make things a little ... opaque. We had some issues with interpenetration: in one case fleeing cavalry contacting enemy infantry and another where a cavalry regiment clipped a friendly battery as it counter-charged. Murdock made some ad hoc rulings and they worked on both accounts. I could see things really flying along if you had a referee entering the data and running the game. As I said earlier, I liked the way things worked and look forward to using the system again.


